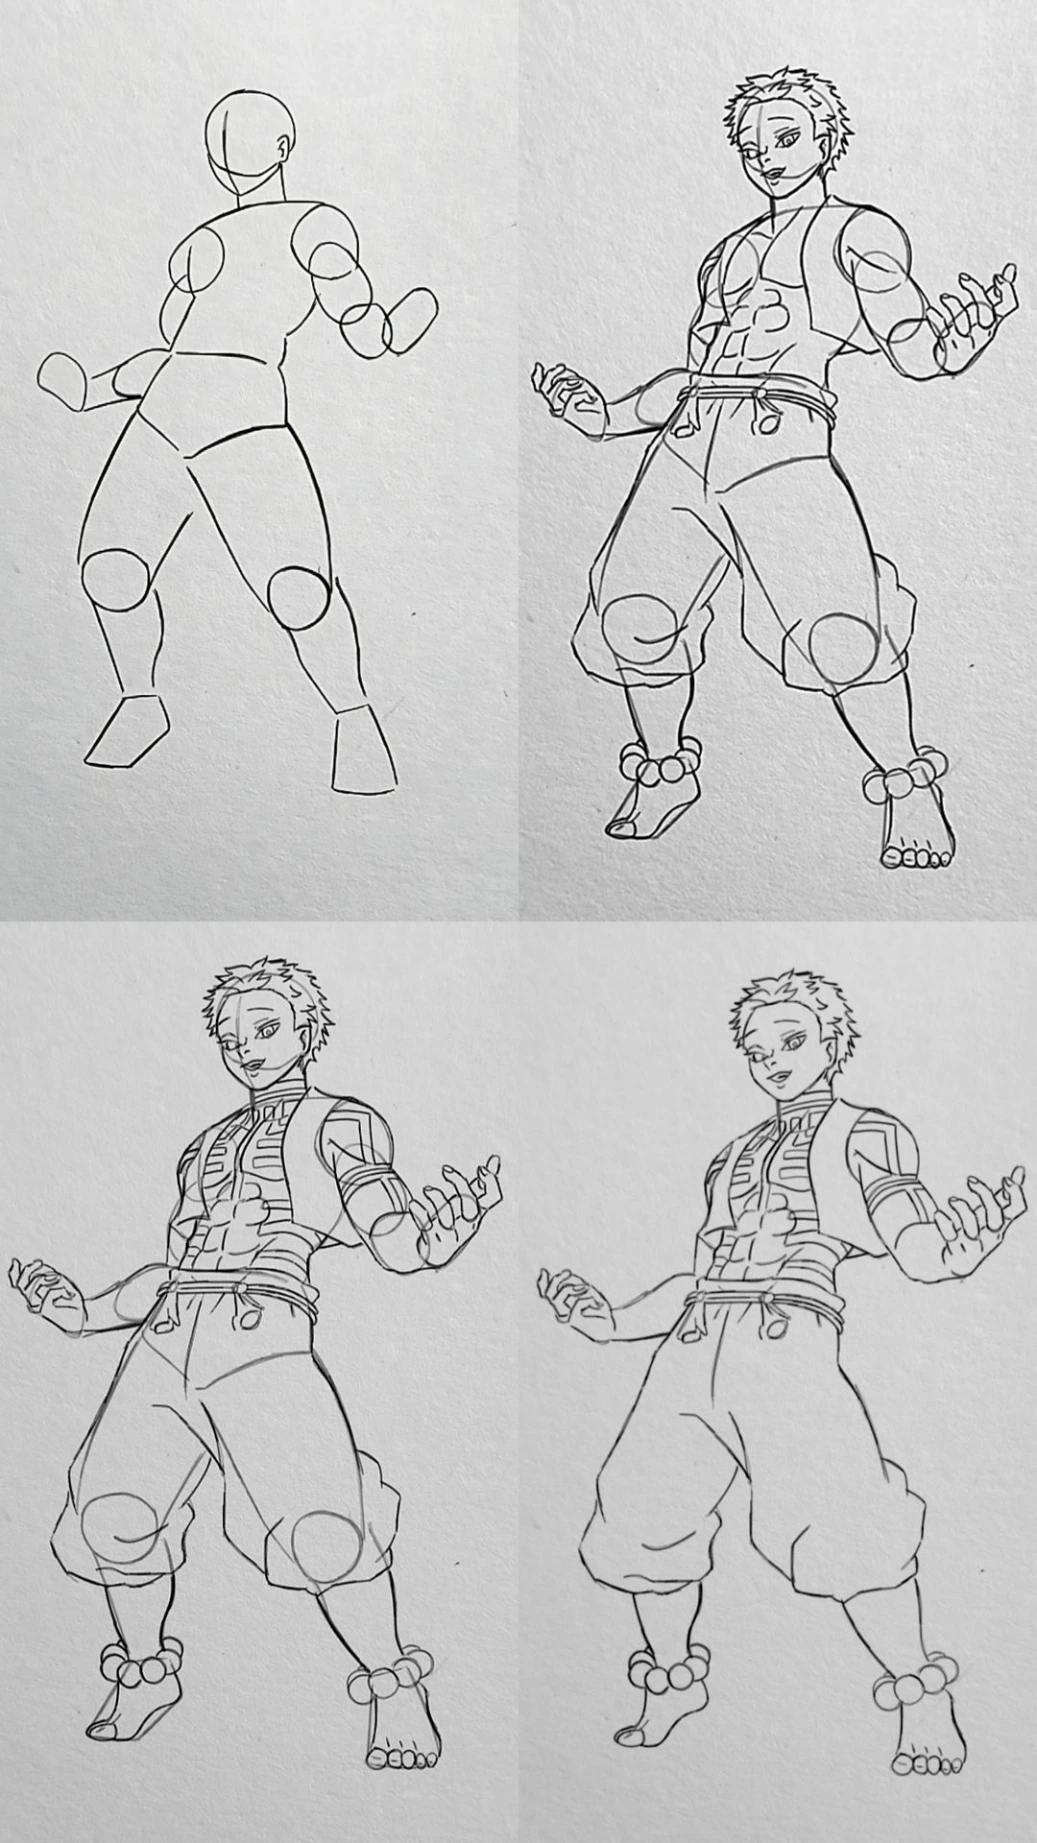
This step-by-step tutorial demonstrates how to draw Akaza from Demon Slayer: Kimetsu no Yaiba in a powerful low-angle pose that emphasizes his strength and dominance.
The process begins with a simple mannequin structure. A basic head shape is drawn with a vertical guideline for facial alignment. The torso is blocked out using a simplified chest and hip form, while the arms and legs are constructed with cylindrical shapes and circular joints to define movement and proportions. The wide leg stance and slightly tilted upper body immediately create a dynamic, intimidating posture.
Next, the rough structure is refined into anatomy. The muscular chest, shoulders, and arms are carefully shaped to highlight Akaza’s athletic build. His loose, baggy pants are added with a tied waistband, and his feet are positioned firmly to enhance the low-angle perspective. Basic facial features and short spiky hair are sketched in to establish his confident, almost playful expression.
After the body structure is complete, Akaza’s signature striped tattoo patterns are drawn across his face, torso, and arms. These curved markings follow the muscle contours, enhancing depth and form. His open vest is added, framing the upper body and giving more visual focus to the chest details.
In the final stage, the construction circles at the knees are cleaned up, outlines are refined, and clothing folds are defined for a natural fabric flow. The result is a strong and balanced illustration of Akaza, capturing his muscular anatomy, iconic markings, and commanding stance through structured construction and clean line work.