
Step-by-Step Drawing Guide: Satoru Gojo
This image is a professional breakdown of how to draw the legendary sorcerer, Satoru Gojo, from Jujutsu Kaisen. It shows the evolution from a simple geometric base to a high-intensity, "battle-worn" portrait.
The 6 Stages of the Artwork
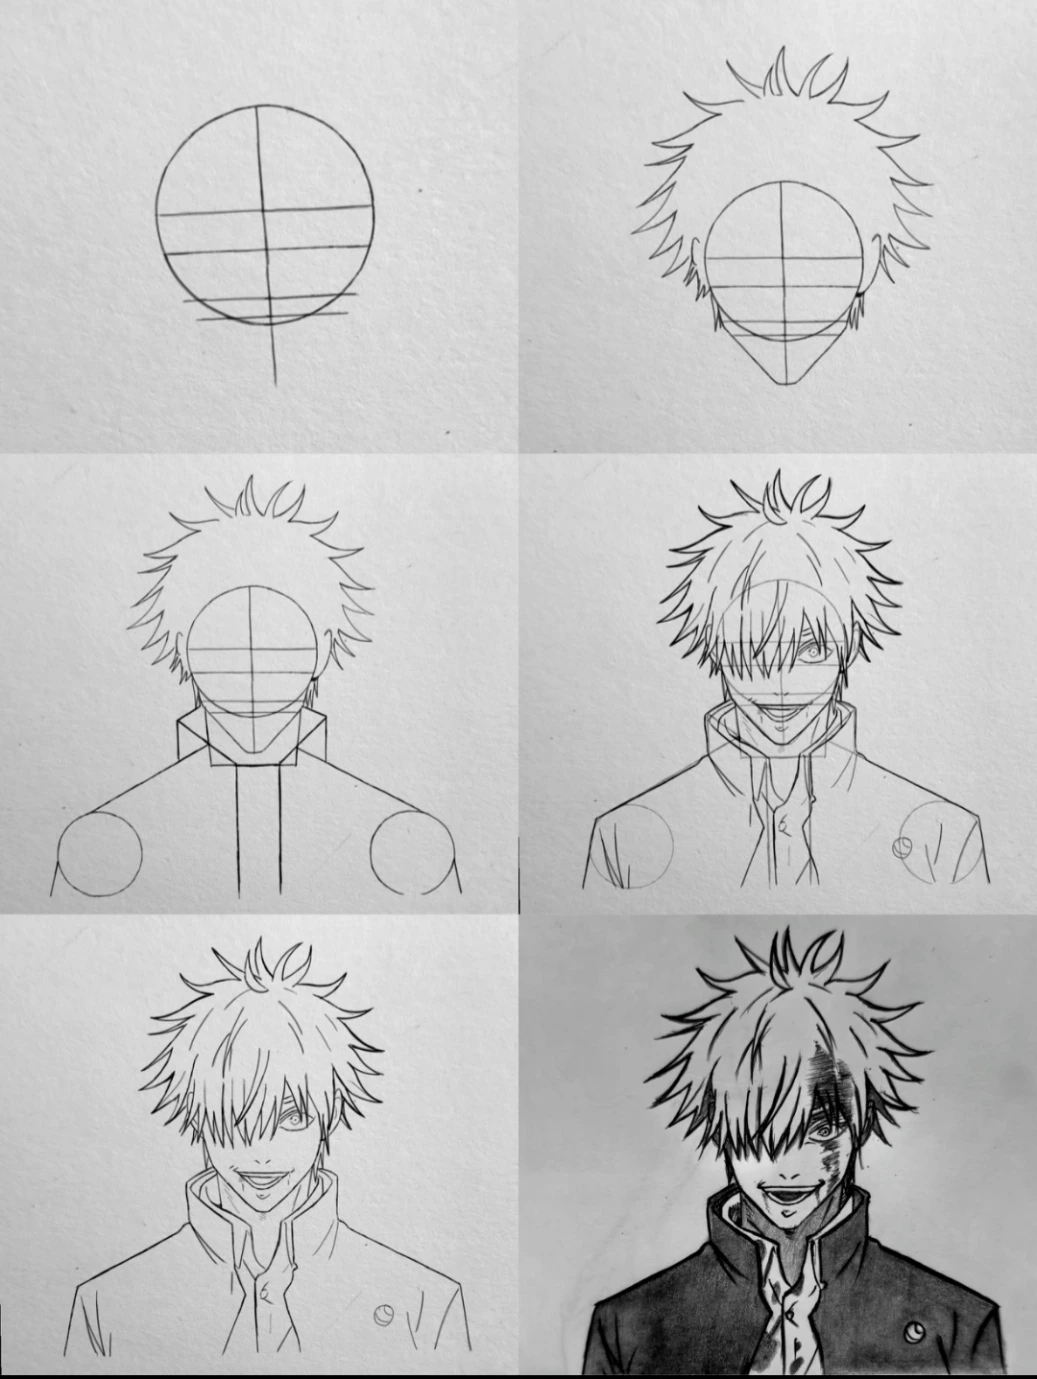
The Foundation (Loomis Method): The artist starts with a basic circle and a vertical line to ensure Gojo's face is perfectly symmetrical. Horizontal guides are added to mark the placement of his eyes and nose.
Defining the Silhouette: Here, the iconic spiky, gravity-defying hair and the sharp, V-shaped jawline are sketched in. This gives the character his recognizable head shape.
Anatomy & Outfit: The high-collared Jujutsu High uniform is added. Notice the circles on the shoulders—these are "joints" used to keep the body proportions balanced.
Facial Features & Expression: The artist draws Gojo's signature intense eyes and a wide, confident grin. This stage captures his playful yet dangerous personality.
Clean Line Art: All the messy "construction lines" (the circles and grids) are erased. What remains is a crisp, clean ink drawing of Gojo.
Final Shading & "Battle Damage": The final step adds depth. Using heavy ink and shading, the artist adds blood splatters and bruises to Gojo’s face, creating a dramatic and powerful "Awakened" look.
Artistic Style
The final image perfectly captures Gojo's "Limitless" energy. The transition from a simple circle to a gritty, shaded warrior shows the importance of building a drawing layer by layer.