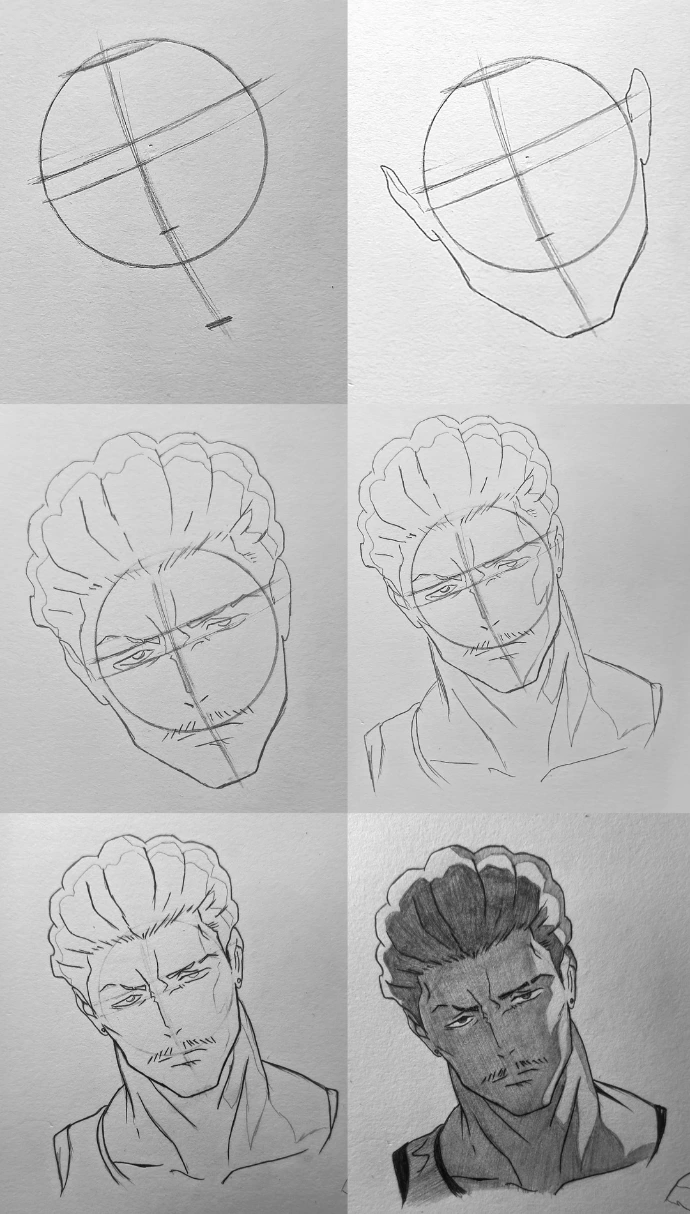
This step-by-step tutorial explains how to draw Kinji Hakari from Jujutsu Kaisen, following the exact construction and progression shown in the image.
Step 1: Draw the Base Circle and Tilted Guidelines
Start with a clean circle to form the skull. Draw a vertical guideline through the center, slightly tilted to match the head angle. Add two curved horizontal guidelines across the upper half of the circle for eyebrow and eye placement. Extend the vertical line below the circle to mark the chin length.
Step 2: Shape the Jaw and Place the Ears
From the sides of the circle, draw angled lines downward to create a strong, masculine jawline. Connect them into a slightly broad chin. Add the ears on both sides, aligned between the eye and nose guidelines. Because the head is tilted, make sure both ears follow the same angle.
Step 3: Block in the Hair Volume
Sketch the overall shape of Hakari’s hair. His hairstyle is pushed upward and backward with thick, wavy sections. Draw large, rounded clumps flowing back from the hairline, creating volume at the top.
Step 4: Add Facial Features
Using the guidelines, draw sharp, slightly narrowed eyes with a confident and intimidating expression. Add thick eyebrows angled downward toward the center for intensity. Sketch a straight nose along the center line. Add a short mustache and light stubble around the mouth and chin to capture Hakari’s mature look.
Step 5: Draw the Neck and Upper Body
Extend a thick, muscular neck downward from the jaw. Add defined neck muscle lines for strength. Sketch the shoulders and a sleeveless outfit, keeping the collar simple and natural.
Step 6: Refine the Lineart
Erase the construction lines carefully. Sharpen the jawline, refine the eyes, and clean up the hair strands. Add small details like earrings and subtle facial lines for realism.
Step 7: Apply Shading
Shade the hair heavily, making one side darker to create strong contrast. Add shadows across one side of the face to emphasize the head tilt and lighting direction. Deepen the shadows under the jaw and along the neck muscles for depth. Lightly shade the stubble area to enhance texture.
The final result captures Kinji Hakari’s confident and dominant presence, combining structured guidelines, strong facial angles, textured hair volume, and bold shading for a powerful anime portrait.