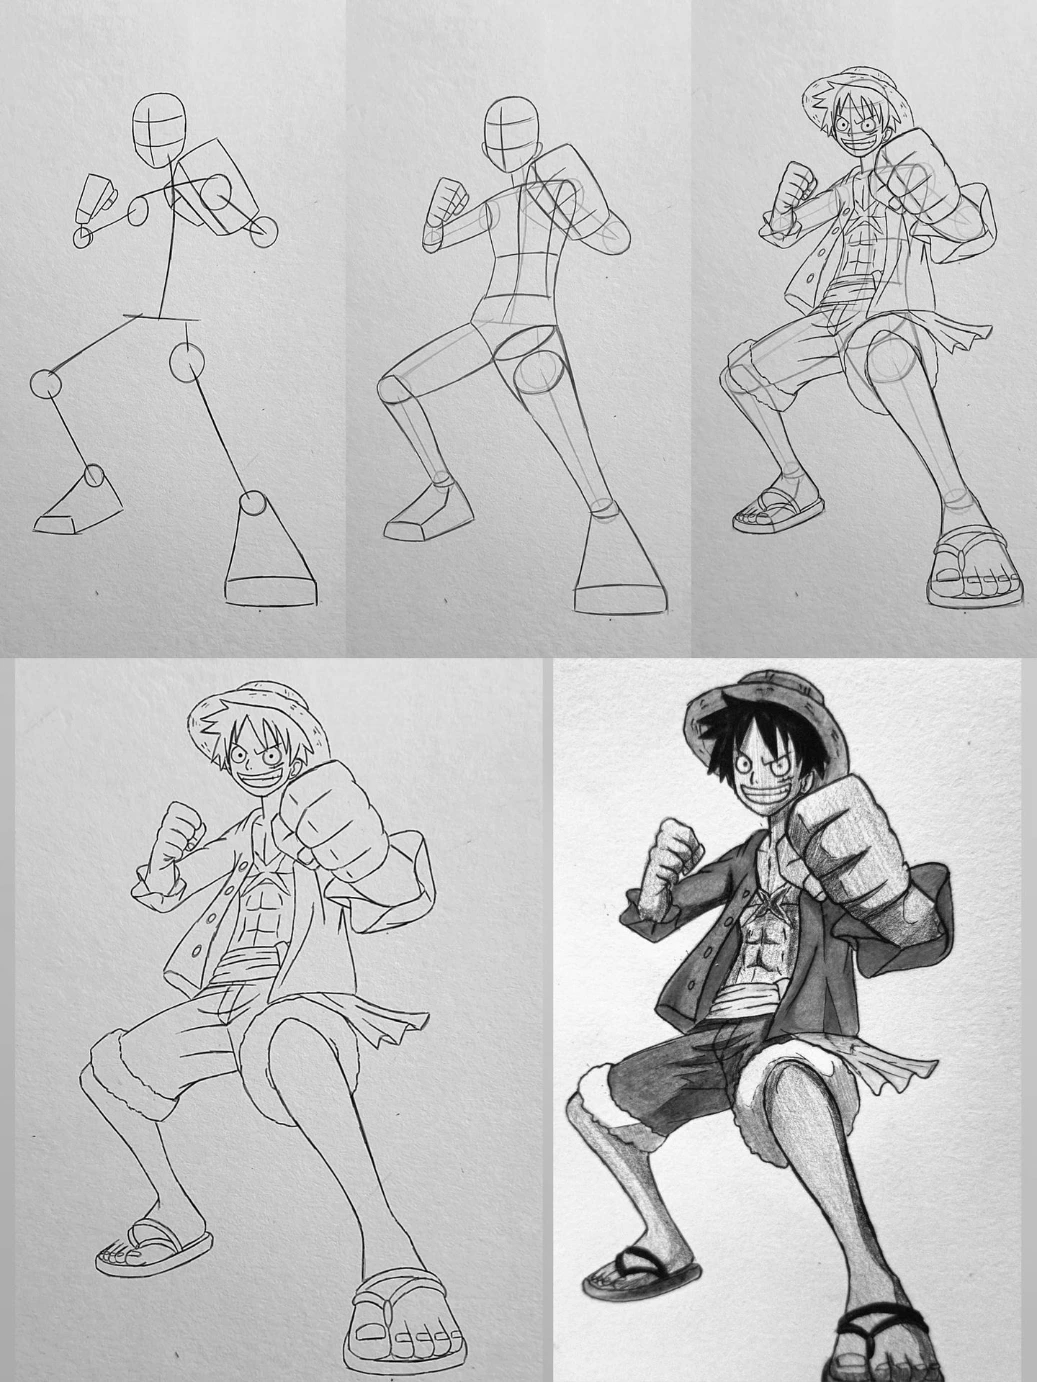
This step–by–step drawing shows the full construction process of Monkey D. Luffy from One Piece in a dynamic fighting pose.
Step 1 – Basic Stick Figure Structure:
The drawing begins with a simple stick figure to establish balance and movement. The head is drawn as an oval with cross guidelines for facial direction. The spine is slightly curved to show action. Circles mark the shoulders, elbows, hips, and knees. The legs are positioned wide apart to create a strong, grounded stance, while both arms are bent upward to suggest a punching pose.
Step 2 – Adding Volume and Form:
In the second stage, basic geometric shapes are added over the skeleton. The torso becomes a defined block with chest and waist structure. Cylinders are used for arms and legs to give thickness. The fists are blocked in as rounded forms, with the right fist drawn larger to emphasize perspective (closer to the viewer). The feet are shaped into simple shoe-like forms to prepare for sandals.
Step 3 – Character Outline and Features:
Here, Luffy’s recognizable features are added. His straw hat is sketched on top of his head. His wide grin, circular eyes, and small scar under the eye are defined. His open shirt, visible abs, knee-length shorts, and sandals are outlined. The oversized front fist is refined to enhance the foreshortening effect, making the pose feel more dynamic.
Step 4 – Clean Line Art:
The rough guidelines are cleaned up. Clothing folds are added to the shirt and shorts for movement. Details like buttons, sandal straps, toes, and hat texture are refined. The body proportions are sharpened, and unnecessary construction lines are erased to create a crisp final outline.
Step 5 – Shading and Final Depth:
In the final step, shading is applied to give depth and dimension. Dark tones are added under the hat brim, inside the shirt, beneath the arms, and along the legs. The shorts and jacket receive heavier shading to create contrast. This stage enhances the 3D effect, making the punch appear closer and more powerful.
Overall, the image clearly demonstrates how to build a dynamic anime character drawing—from a simple skeleton to a fully shaded, energetic illustration of Luffy ready for action.