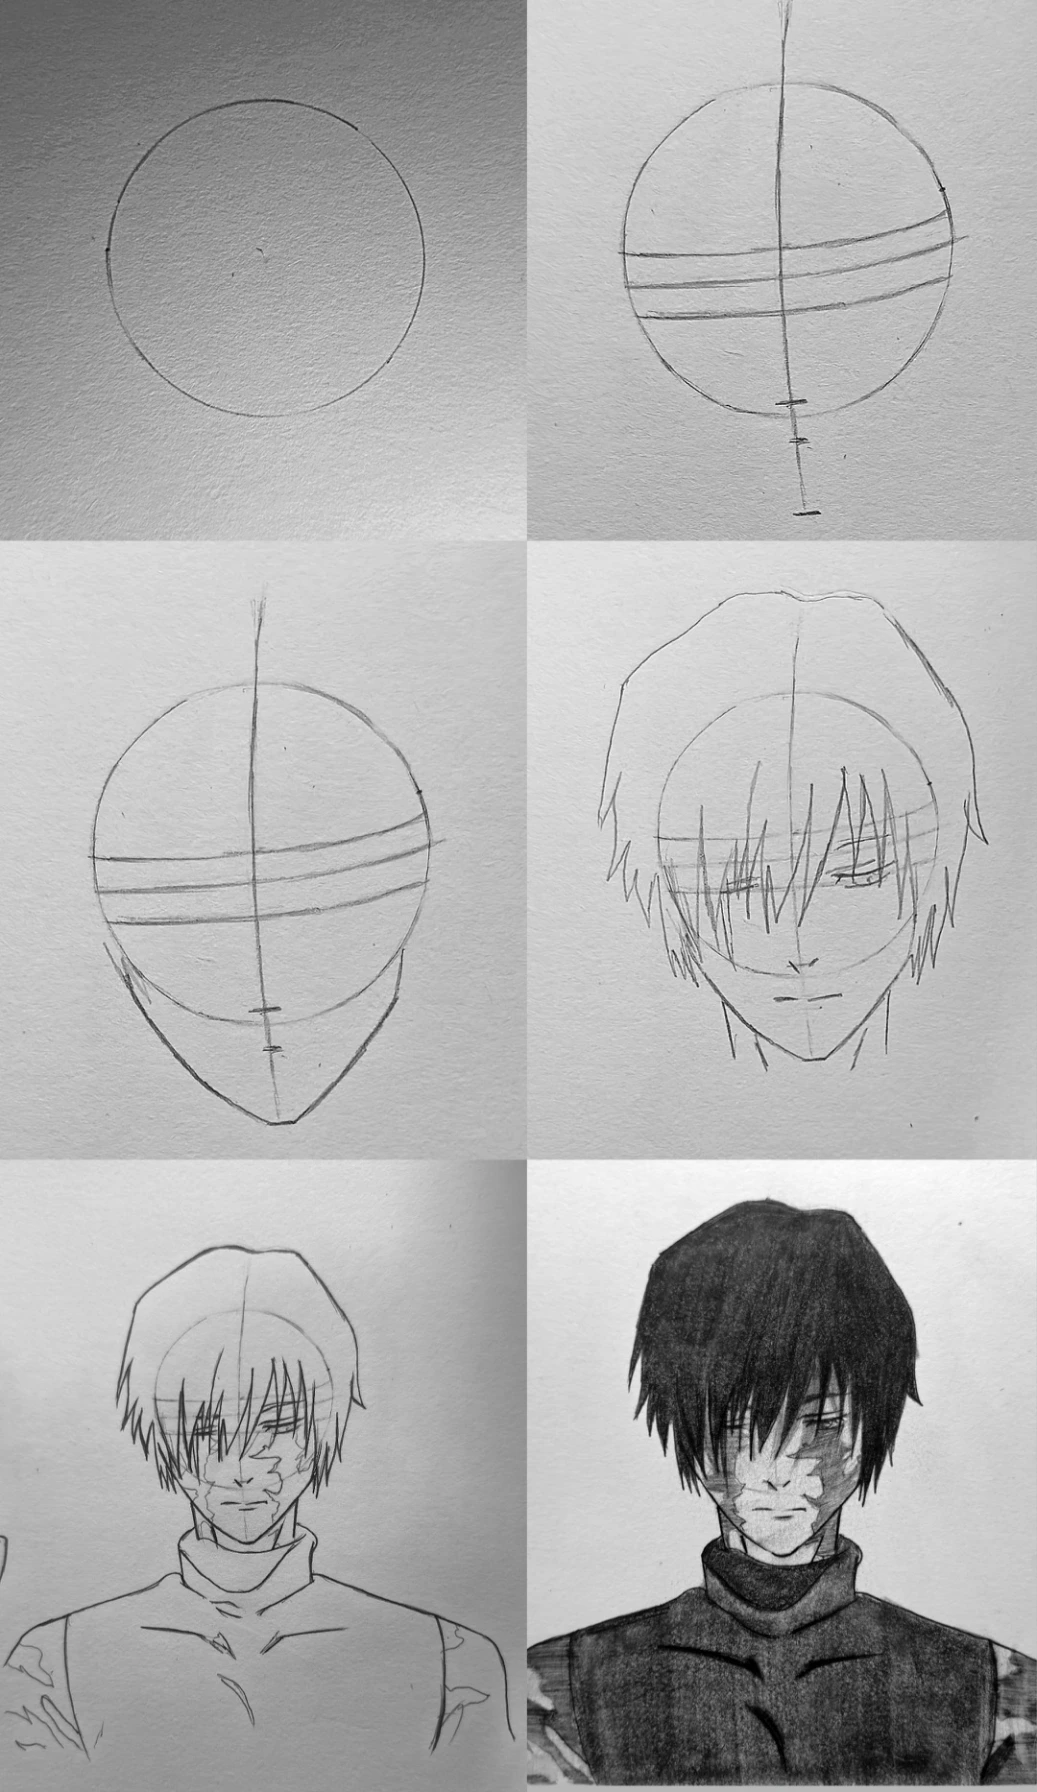
Step-by-step drawing of Maki Zenin begins with a simple circle to establish the head base. A vertical center line is drawn to maintain facial symmetry, followed by three slightly curved horizontal guidelines across the middle section to correctly position the eyes and maintain anime-style proportions.
Next, the lower sides of the circle are extended inward to form a sharp jawline and pointed chin, creating a slim and defined anime face shape. Using the guidelines, narrow and slightly serious eyes are sketched to capture Maki’s intense expression. A small, minimal nose and straight mouth line are added to keep the look clean and strong.
Short, layered hair is then drawn around the head, with uneven strands falling naturally over the forehead. The neck is extended downward and a high-collar uniform is added to match her appearance. Distinct burn scars are carefully sketched across the face and visible parts of the body to reflect her battle-hardened version.
In the final stage, the outlines are refined and deep pencil shading is applied. The hair is shaded dark for strong contrast, while the outfit receives smooth, even shading to add depth. This completes a bold and dramatic portrait of Maki Zenin with proper proportions, expressive features, and clean anime-style detailing.