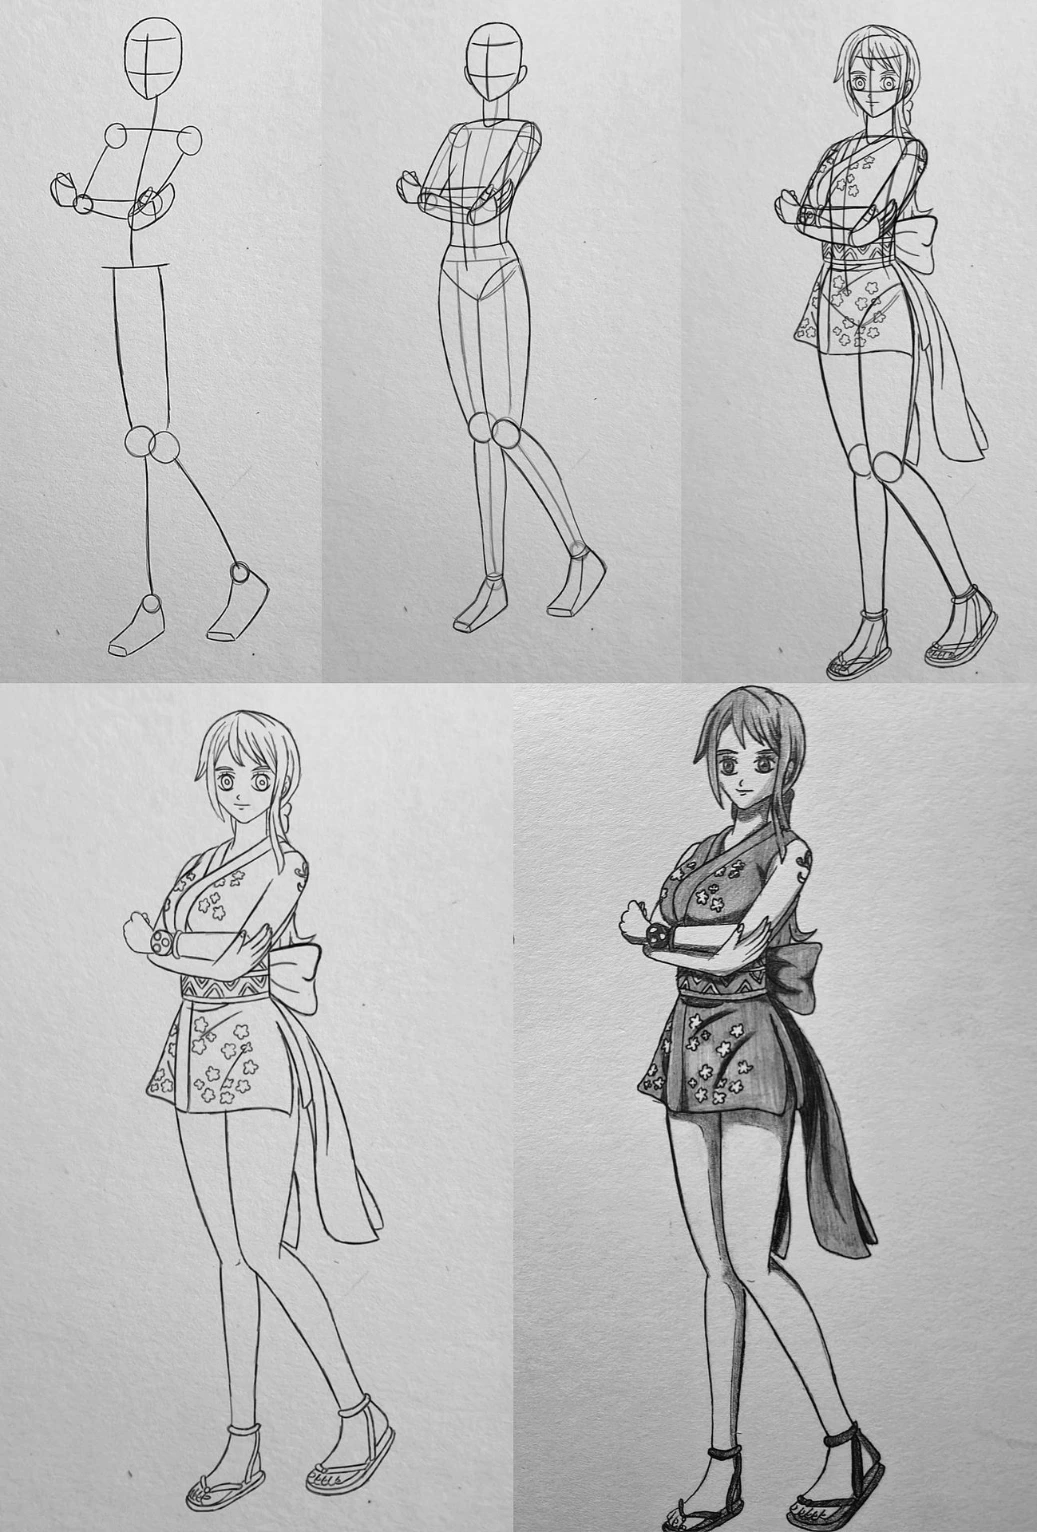
Step 1 – Basic Pose Construction:
The drawing starts with a simple stick figure. An oval head is sketched with facial guidelines to set direction. The spine is drawn slightly curved to give a natural stance. Circles mark the shoulders, elbows, hips, and knees. The arms are positioned crossed in front of the chest. One leg stands straight while the other bends slightly, creating a relaxed, confident pose.
Step 2 – Adding Body Form:
The skeleton is built up using simple shapes. The torso is shaped with a defined waist and chest. Cylinders are added for arms and legs to create volume. The hips are angled slightly for a feminine silhouette. Basic foot shapes are blocked in to prepare for sandals.
Step 3 – Facial Features and Outfit:
Nami’s large anime-style eyes, small nose, and soft smile are drawn. Her medium-length hair is sketched flowing down with side bangs framing the face. The short kimono-style dress is added with floral patterns. The wide obi belt and large bow at the back are drawn, along with the long flowing ribbon tails. Arms are refined in their folded position.
Step 4 – Clean Line Art:
All construction lines are erased. The outfit details such as floral prints, sleeve edges, belt pattern, and sandal straps are carefully outlined. The body proportions are cleaned up, and the overall silhouette becomes smooth and polished.
Step 5 – Shading and Final Details:
Shading is added under the hair, along one side of the body, beneath the skirt, and on the legs to show light direction. The bow and flowing ribbon receive darker tones for depth. Final contrast makes the character look more dimensional and complete.
This image clearly demonstrates how to build Nami step by step — from a simple mannequin base to a fully shaded, elegant anime illustration.