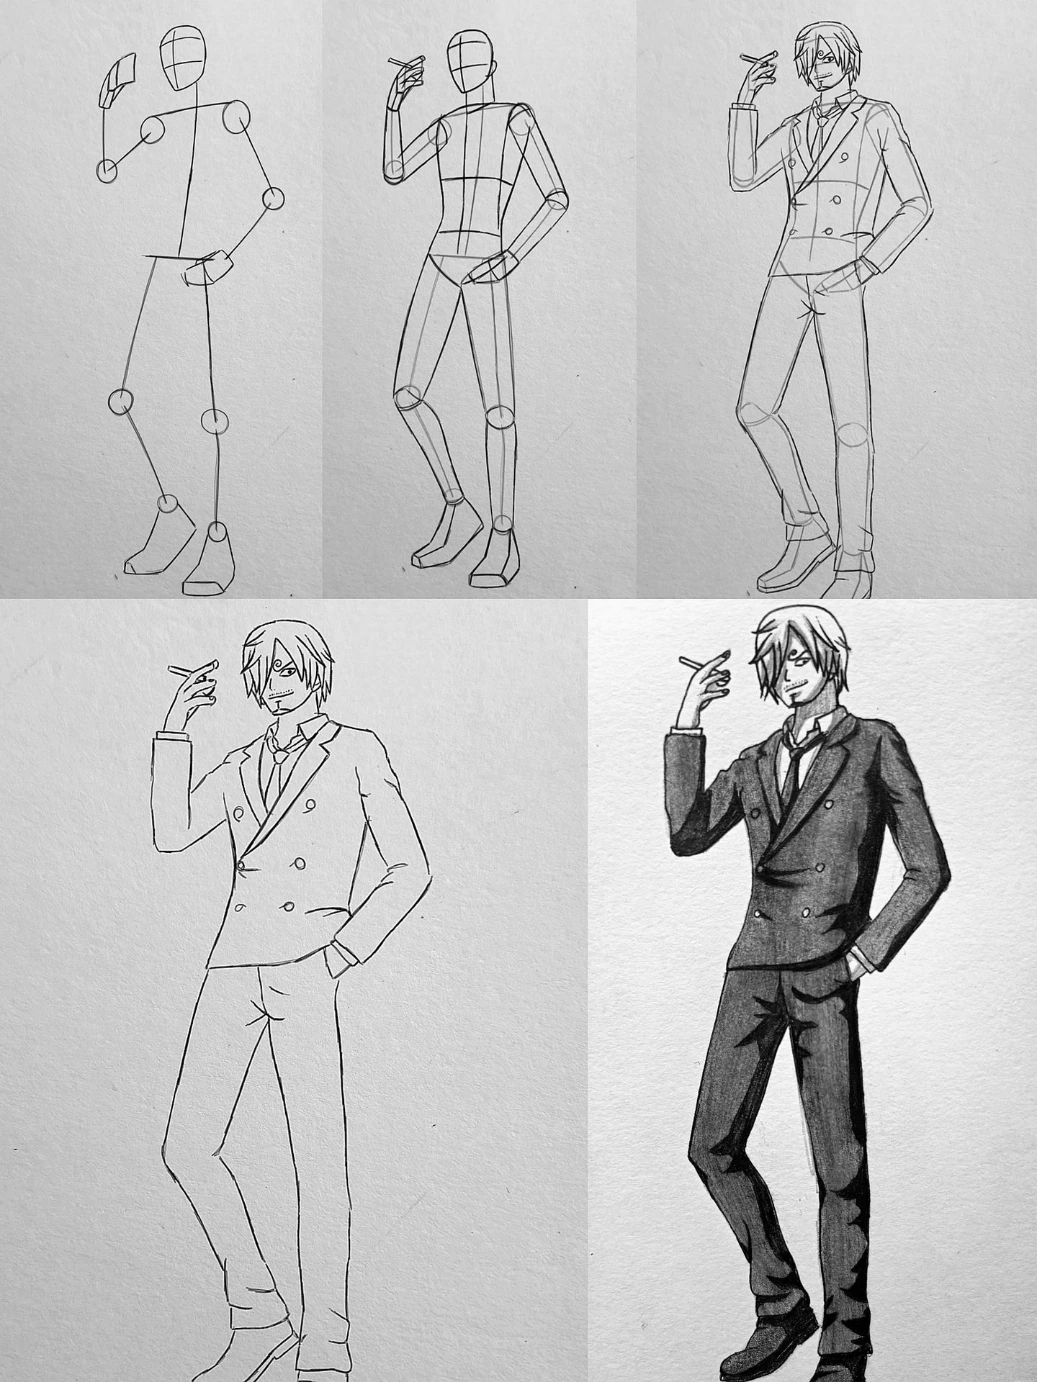
This step-by-step drawing tutorial shows the full construction process of Sanji from One Piece, illustrated in his classic cool pose holding a cigarette.
Step 1 – Basic Stick Framework:
The drawing begins with a simple stick figure to establish posture and balance. An oval head is sketched with facial guidelines to determine direction. The spine is slightly curved, giving a relaxed, stylish stance. Circles mark the shoulders, elbows, hips, and knees. One arm is raised near the face to hold the cigarette, while the other rests casually near the pocket. The legs are positioned with one slightly bent, creating a natural lean.
Step 2 – Building Body Volume:
The stick structure is developed into a mannequin form. The torso is shaped with a defined chest and waist. Cylindrical forms are added for arms and legs to create proportion and structure. The shoulders are aligned to match the relaxed pose. Basic shoe shapes are added, and the hand holding the cigarette is refined for better finger placement.
Step 3 – Character Features and Outfit Details:
Sanji’s signature hairstyle is drawn, with long bangs covering one eye. His sharp facial features and calm expression are refined. The double-breasted suit jacket is sketched with lapels, buttons, and a visible tie underneath. His trousers are shaped to fit naturally over the legs. The hand-in-pocket pose is cleaned up, and the cigarette is clearly defined between his fingers.
Step 4 – Clean Line Art:
Construction lines are erased. The suit edges, collar, buttons, and shoe details are sharpened. Fabric folds are added around the elbows, waist, and knees to show movement and realism. The silhouette becomes clean and polished.
Step 5 – Shading and Final Depth:
Shading is applied to give dimension. Dark tones are added under the hair, beneath the jacket folds, along one side of the legs, and under the arms. The suit receives heavier shading to create contrast, making the character look bold and stylish. Highlights are preserved to maintain form and depth.
Overall, the image clearly demonstrates how to construct Sanji step by step—from a simple skeleton base to a fully shaded, elegant anime character illustration.