Step-by-Step Drawing Guide: Ryomen Sukuna
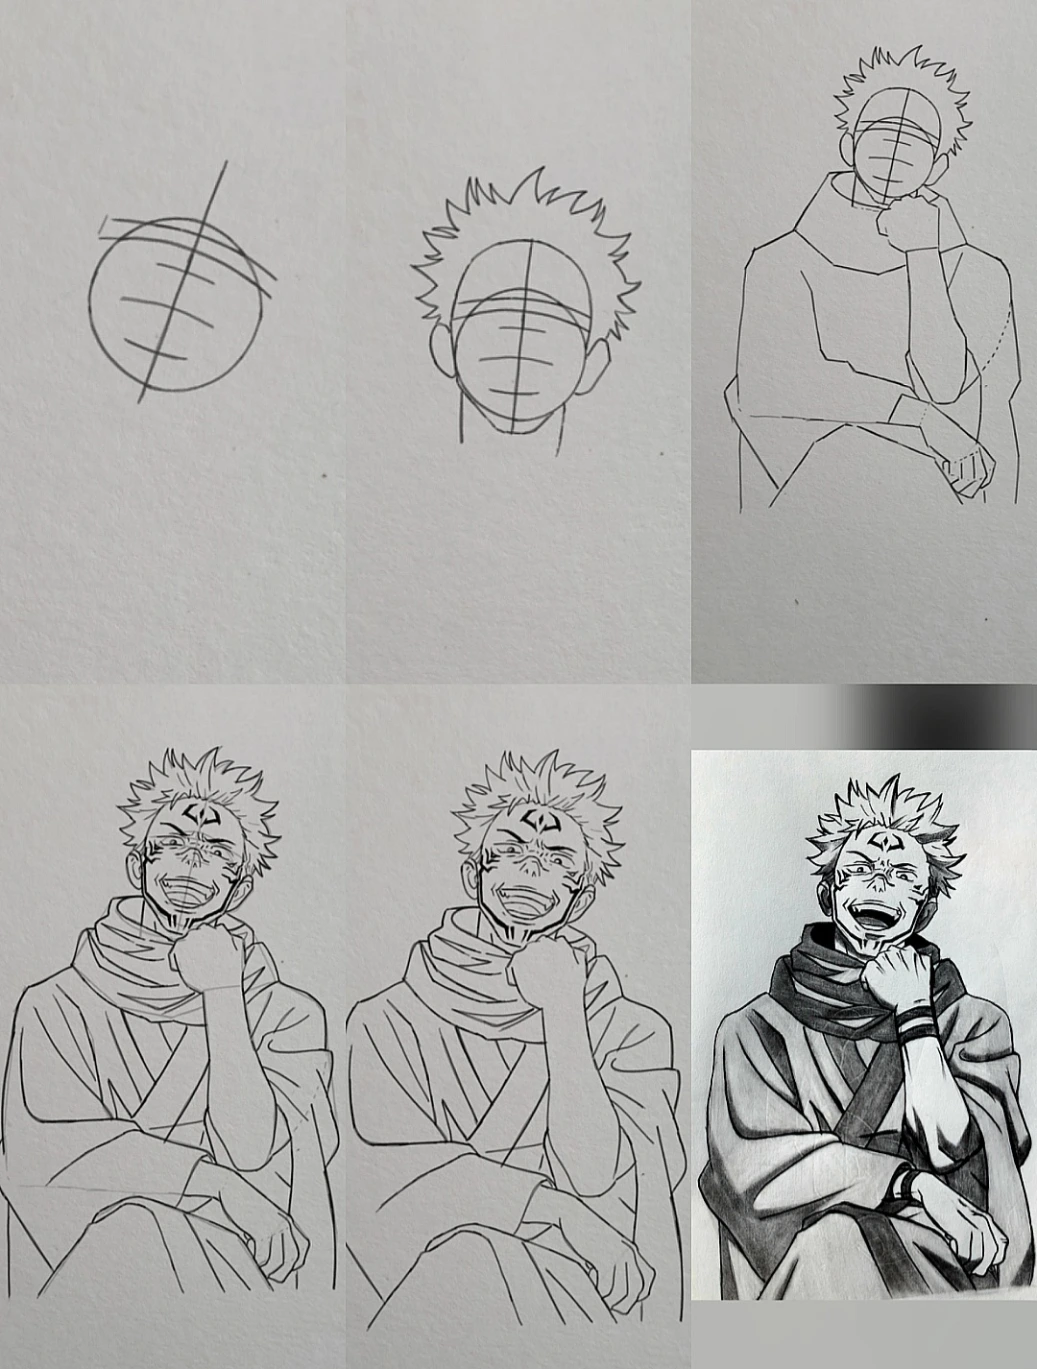
This image illustrates the detailed process of drawing Ryomen Sukuna (in Yuji Itadori's body) from Jujutsu Kaisen. It showcases how to transition from a basic structural sketch to a Menacing, high-contrast final portrait.
The 6 Stages of the Artwork
Step 1: Head Construction: The process starts with a simple circle and a central axis line. Horizontal guidelines are added to establish the tilt of the head and the correct placement for the eyes and brow.
Step 2: Defining the Hair and Jaw: The artist adds Sukuna’s signature swept-back, spiky hair and defines the sharp chin and ears. The grid lines inside the face help keep the features aligned.
Step 3: Body Blocking: A rough outline of the pose is created. Sukuna is shown in a relaxed yet arrogant sitting position, with his hand resting under his chin. The loose shapes of his traditional kimono are mapped out here.
Step 4: Adding the Iconic Marks: This is where the character truly appears. The artist sketches the forehead markings, the secondary eyes under the main ones, and that classic, sinister wide-mouthed grin.
Step 5: Refining the Line Art: The sketch is cleaned up into a solid "Line Art" version. Every detail—from the folds in the scarf to the markings on his arms—is sharpened, and all the initial guide circles are removed.
Step 6: Masterful Shading: The final stage uses heavy pencil or ink shading to add depth and "weight" to the clothing. The dark, dramatic shadows emphasize Sukuna’s intimidating presence and the texture of his robes.