Start writing here...Step-by-Step Drawing Guide: Yuji Itadori & Sukuna
This tutorial focuses on a dynamic, perspective-heavy pose where Yuji Itadori is shown with Sukuna’s mouth and eye emerging from his palm. This is one of the most iconic "body horror" elements from Jujutsu Kaisen.
The 6 Stages of the Artwork
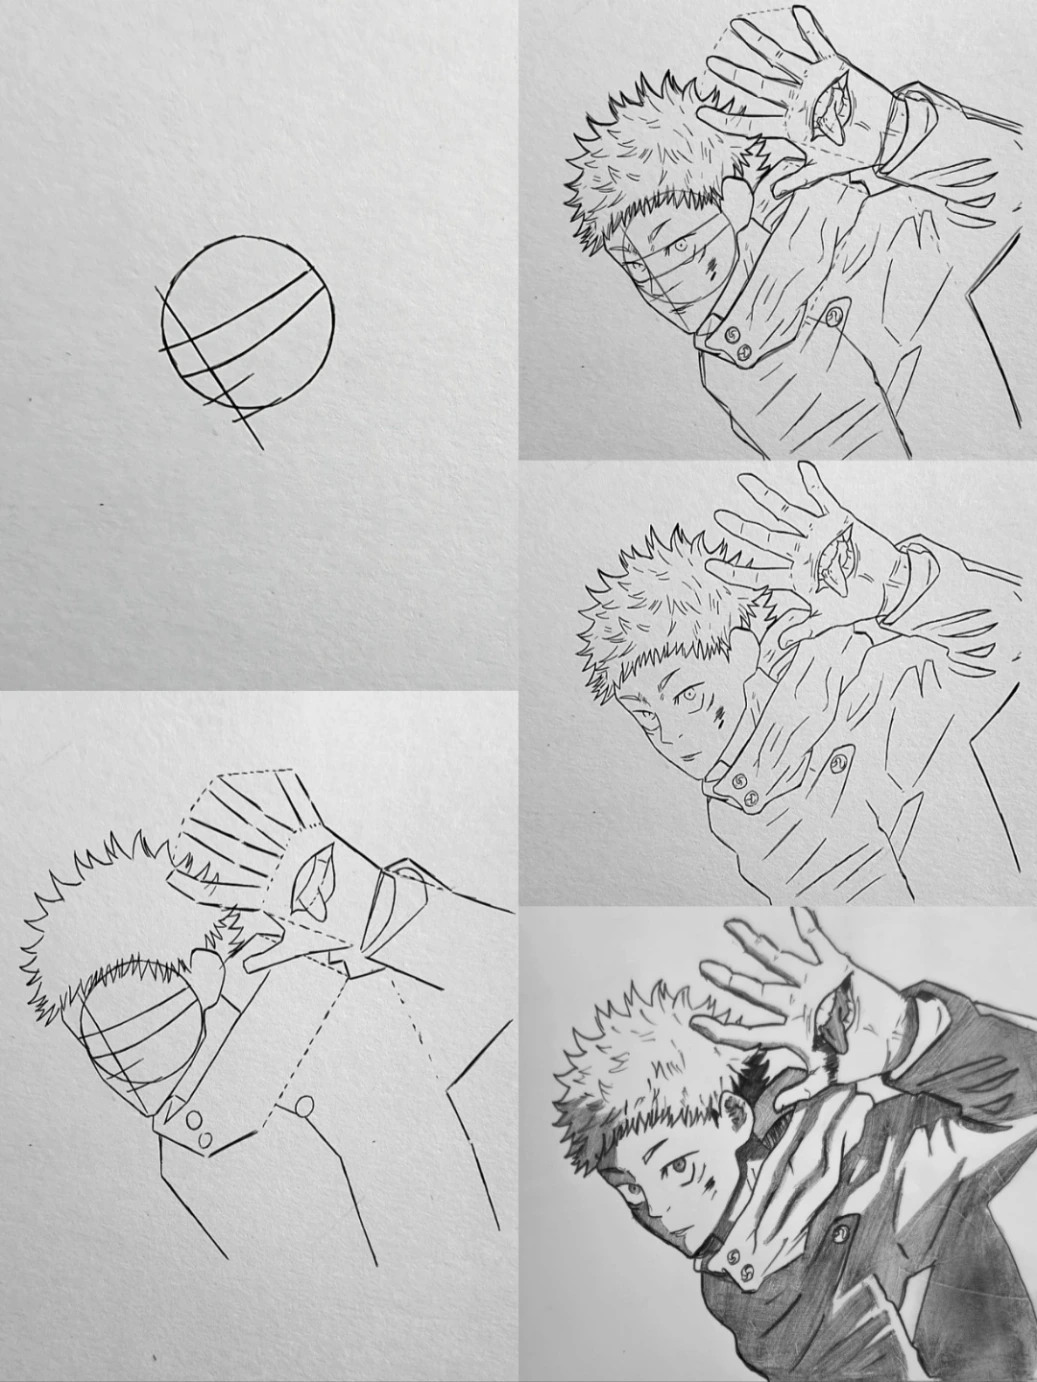
Step 1: The Tilted Base: The artist starts with a simple circle and three horizontal guidelines. The tilt of these lines is crucial because it sets the "upward" perspective of Yuji's face.
Step 2: Blocking the Silhouette: The spiky hair and the basic shape of the raised hand are sketched. Using rough geometric shapes for the hand helps ensure the fingers look natural and proportional.
Step 3: Character Detailing: The artist adds Yuji’s facial features and his signature hooded uniform. Most importantly, the eye and mouth of Sukuna are drawn onto the palm of the hand.
Step 4: Refined Sketching: The lines are darkened, and the "under-sketch" (the initial circles and grids) is lightly erased to leave a clear path for the final ink.
Step 5: Clean Line Art: A crisp, final outline is created. This stage highlights the "Manga" style, focusing on sharp edges and clean transitions between the hair and the hoodie.
Step 6: High-Contrast Shading: The final version uses heavy pencil shading to create depth. The dark shadows inside the hoodie and the gradient on the hair make the drawing look three-dimensional and intense.
Artistic Highlight
The most difficult part of this drawing is the foreshortening—making the hand look like it is coming directly toward the viewer while Yuji's face stays in the background. It perfectly captures the constant struggle between the two characters sharing one body.