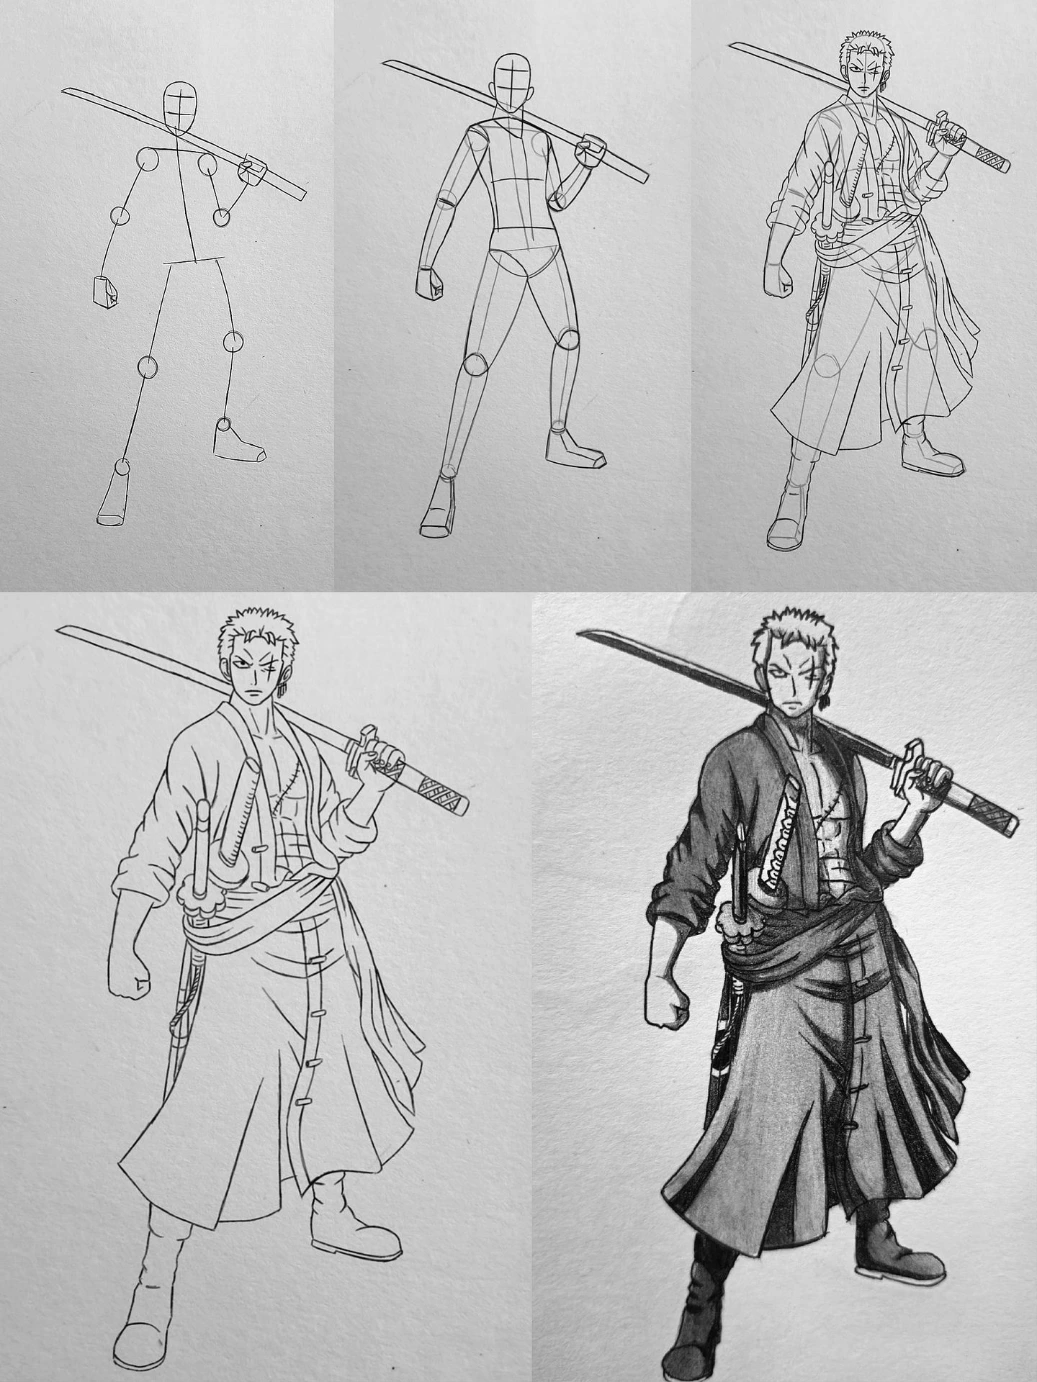
This step-by-step drawing tutorial shows the complete construction process of Roronoa Zoro from One Piece, illustrated in a strong swordsman stance with one katana resting over his shoulder.
Step 1 – Basic Skeleton and Pose Layout:
The drawing begins with a simple stick figure. An oval head is sketched with facial guidelines to set the direction of the face. A straight but slightly angled spine defines the posture. Circles mark the shoulders, elbows, hips, and knees. One arm is raised to hold the sword across the shoulder, while the other arm hangs down with a clenched fist. The legs are placed apart to create a stable, grounded stance. A long straight line indicates the sword’s placement and balance.
Step 2 – Adding Body Volume and Structure:
The stick figure is built into a solid mannequin form. The torso is shaped into a defined chest and waist block. Cylindrical forms are added to arms and legs for muscle mass. The shoulders are broadened to reflect Zoro’s strong build. The sword is refined with proper thickness, and the hand gripping it is shaped more clearly. Basic boot shapes are added to the feet.
Step 3 – Character Features and Outfit Details:
Zoro’s sharp facial features are drawn, including his intense eyes, stern expression, and short spiky hair. His signature scar over the eye is added. The open coat is sketched with folds and movement. His muscular chest and stitched scar details are outlined. The waist sash (obi) is drawn wrapped tightly, holding multiple swords at his side. The hanging coat panels are shaped to show motion and weight.
Step 4 – Clean Line Art:
All construction lines are erased. The coat edges, sword handles, belt folds, and boot details are carefully refined. The proportions are sharpened, and fabric creases are added to enhance realism. The sword resting on his shoulder is cleaned for a crisp, straight finish.
Step 5 – Shading and Depth:
Shading is applied to create strong contrast. Dark tones appear under the coat, along one side of the torso, beneath the sash, and inside the folds of the long coat panels. The boots and lower half receive heavier shading to ground the character. The sword and clothing shadows add depth, giving the final drawing a powerful, three-dimensional look.
Overall, the image clearly demonstrates how to construct Roronoa Zoro step by step—from a simple stick framework to a fully shaded, bold anime warrior illustration.